
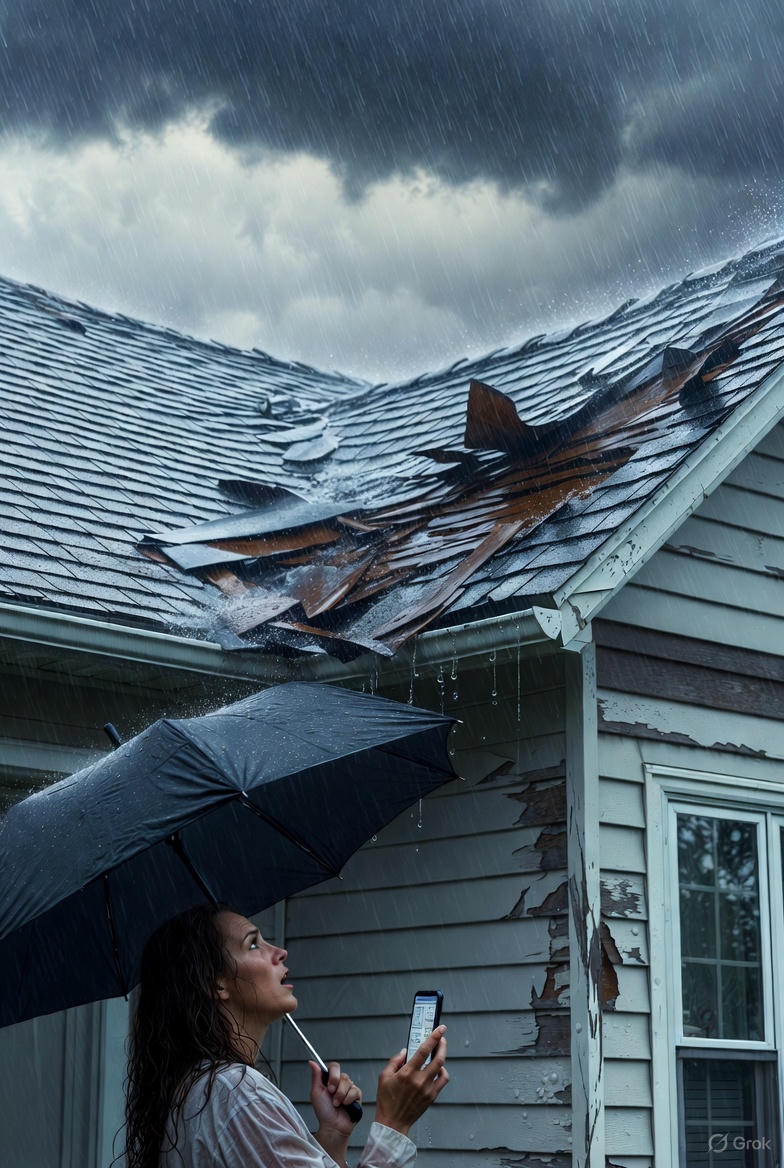
The sudden, unmistakable sound of a drip in your attic during a rainstorm is a universal homeowner nightmare. That panic is often followed by a frantic grab for the phone to search for a “roofing and siding company near me” that can fix the problem right now. A damaged roof is a direct threat to your home’s integrity, and the urgency can make it tempting to hire the first person who answers the phone. This, however, is one of the most critical and high-stakes hiring decisions you will make. The right contractor can provide decades of security, while the wrong one can lead to financial disaster, endless leaks, and structural ruin.
This guide is designed to cut through the noise. It will provide a clear, step-by-step process for finding, vetting, and hiring the right contractor for your roofing project, ensuring your home is protected and your investment is sound.
The Dangers of Hiring the Wrong Contractor
Choosing a roofer based solely on a low price or a quick availability is a gamble you cannot afford to take. The roofing industry, unfortunately, has a low barrier to entry, which attracts a wide range of operators, from seasoned professionals to unqualified “storm chasers.”
Storm chasers are contractors who follow severe weather from town to town, offering to “fix” roofs for a quick insurance check. They perform fast, substandard work and are gone by the time the next rainstorm reveals their shoddy installation, leaving homeowners with a voided warranty and no one to call.
Financial Risks: From Liens to Lawsuits
The most immediate danger lies in insurance and liability.
- No Worker’s Compensation: If you hire an uninsured contractor and one of their workers falls from your roof, you can be held personally liable for their medical bills and lost wages. Your homeowner’s insurance will likely deny the claim, as you hired an uninsured entity.
- No General Liability: If the contractor damages your property—for example, by dropping a bundle of shingles on your car or cracking your driveway with a heavy dumpster—you will have to pay for the repairs yourself.
- Mechanic’s Liens: An unethical contractor might fail to pay their material supplier. That supplier can then place a mechanic’s lien on your property, making you responsible for the unpaid bill. You could end up paying for your roof twice.
Poor Workmanship: Leaks, Failures, and Voided Warranties
A modern roof is not just a layer of shingles; it is a complex, integrated system of components: decking, underlayment, ice and water shields, flashing, ventilation, and the shingles themselves.
A “30-year” shingle warranty from the manufacturer is not a 30-year guarantee against leaks. It is a warranty that the shingles themselves will not have a factory defect. This warranty is almost always voided if the roof is not installed according to the manufacturer’s strict specifications.
Improper installation—such as using the wrong number of nails, poor flashing technique around a chimney, or blocking attic ventilation—is the number one cause of premature roof failure. The wrong contractor will not only give you a roof that leaks, but they will also void the material warranty, leaving you with no recourse.
Step 1: Defining Your Project Scope
Before you can get accurate bids, you need to have a clear idea of what you’re asking for. A contractor needs to know what they are bidding on.
Is It a Simple Repair or a Full Replacement?
This is the first major question.
- Repairs are typically for localized, acute damage. For example, a windstorm blew off a 10×10 section of shingles, but the rest of the roof is in good condition. A repair can be a cost-effective solution if the roof is less than 15-20 years old.
- Replacement is necessary when the roof is at or near the end of its lifespan, or the damage is widespread. If your shingles are curling, brittle, and shedding granules across the entire roof, “patching” one leak is a waste of money; another will just spring up elsewhere.
Signs you need a full replacement:
- Age: An asphalt shingle roof is typically 20-30 years. If yours is in that range, it’s time.
- Widespread Granule Loss: Check your gutters for large amounts of “sand.” This is the protective top layer of your shingles.
- Curling or Buckling: Shingles that are lifting at the edges or buckling in the middle are failing.
- Multiple Leaks: One leak can be a fluke. Multiple leaks signal a systemic failure.
Choosing Your Materials (Asphalt, Metal, Tile)
Knowing your material is key. The contractor you choose must be an expert in the material you want.
- Asphalt Shingles: The most common and affordable option.
- Metal Roofing: More expensive upfront but lasts 50-70+ years and is highly durable.
- Tile/Slate: Extremely heavy and expensive, requiring specialized structural support and installation.
A roofer who has only ever installed asphalt shingles is not the person you want to hire to install a complex standing-seam metal roof.
Step 2: The Search for “Local Roofers Near Me”
Your initial online search is just a starting point. It will give you a list of names, but it won’t tell you who is good. Here is how to build a better list.
Beyond the Basic Search: Where to Find Reputable Names
- Ask for Personal Referrals: This is the gold standard. Ask neighbors, family, and co-workers who they have used and, more importantly, if they would use them again.
- Check Manufacturer Websites: This is a powerful, underused tool. Top manufacturers like GAF, CertainTeed, and Owens Corning have certification programs. They train and certify contractors on their specific products. A “GAF Master Elite” or “CertainTeed ShingleMaster” contractor is not only experienced but can offer enhanced warranties backed directly by the manufacturer.
- Local Building Supply Stores: Go to the contractor desk at your local lumberyard or roofing supply house (not a big-box store). Ask them who they recommend. They know who pays their bills on time and who buys quality materials.
- Check the Better Business Bureau (BBB): Look for companies with an A+ rating and a long history of resolving complaints.
The “Local” Advantage: Why Proximity Matters
There is a reason “local” is so important.
- Warranty Service: The most crucial part. If your new roof springs a leak two years later, you need the contractor to be around to honor their workmanship warranty. A local company with a physical office and a 20-year history is not going to disappear.
- Reputation: A local company lives and dies by its reputation in the community. They can’t afford to do bad work.
- Knowledge of Local Codes: A roofer from two counties over may not know the specific ice dam or wind-uplift requirements in your exact municipality. A local roofer builds to your specific code every single day.
Step 3: The Non-Negotiable Vetting Process
Once you have a list of 3-5 promising names, it is time to vet them before you even ask for an estimate. Do not waste your time getting a bid from a company that cannot pass this initial screening.
Must-Have #1: Valid Licensing and Full Insurance
This is the most important step. Do not skip it.
Ask the contractor to provide a Certificate of Insurance (COI). This document is their proof of insurance. It must list two things:
- General Liability Insurance: This covers damage to your property. Look for a policy of at least $1,000,000.
- Worker’s Compensation Insurance: This covers injuries to their employees. This is required by law. If they claim their employees are “subcontractors,” that is a massive red flag.
Action: Call the insurance agency listed on the certificate to verify that the policy is current and active. Also, call your local building department to verify their state or local license.
Must-Have #2: Manufacturer Certifications
As mentioned, this is a sign of a high-quality operation. Ask them, “Are you certified by any of the manufacturers you install?”
Certified contractors have been trained on installation, are financially stable, and are properly insured (manufacturers verify this). This certification often gives you access to the best warranties, which cover not just the material but also the workmanship for up to 25 years.
Must-Have #3: A Portfolio of Verifiable Local Work
Do not be impressed by a slick photo gallery on a website. Those photos could be from anywhere.
Ask for a list of 10-15 addresses of projects they have completed in your area within the last year. Take an afternoon and go look at them.
- Are the shingle lines straight?
- Is the flashing around the chimneys and in the roof valleys clean and professional?
- Does the job site look neat (if it’s a current job)?
Then, ask for 3-5 references from that list that you can actually call. Ask them:
- Did the project stay on budget?
- Were there any surprises, and how were they handled?
- Was the communication with the crew clear?
- Was the cleanup thorough?
- Would you hire them again?
Step 4: Decoding the Estimates
After a contractor passes the vetting stage, invite them to your home to inspect the roof and provide a detailed, written estimate. Get at least three.
Comparing Apples to Apples: What a Good Bid Includes
Never accept a one-line estimate that says, “New roof: $18,000.” A professional bid is a multi-page document that breaks down every aspect of the job. It must include:
- Scope of Work: A detailed line-by-line list (e.g., “Tear off all existing (1) layers of shingles and felt paper”).
- Specific Materials: The brand, product line, and color of all materials.
- Shingles: (e.g., “GAF Timberline HDZ, Charcoal”)
- Underlayment: (e.g., “Install new synthetic underlayment on all decking”)
- Ice & Water Shield: (e.g., “Install 6 feet of ice & water shield at all eaves, valleys, and penetrations”)
- Flashing: (e.g., “Replace all step flashing, counter flashing, and pipe boots”)
- Decking Contingency: This is critical. The contractor cannot see the wooden roof deck until the old shingles are off. A good contract will state, “If rotted or damaged roof decking is found, it will be replaced at a cost of $X per sheet.” This prevents a massive surprise bill.
- Permit Fees: It should state who is responsible for pulling and paying for the permits. (It should be the contractor).
- Cleanup and Disposal: It should specify that a dumpster will be used and that your property will be swept with magnetic rollers to find nails.
- Payment Schedule: A 10-30% deposit is normal. Never pay 50% or more upfront. The final payment should not be due until you are 100% satisfied with the completed work.
- Timeline: An estimated start and completion date (weather permitting).
Red Flags: The “Too Good to Be True” Bid
If you get three bids for $18,000, $19,500, and $11,000, throw the $11,000 bid in the trash. It is not a bargain; it is a trap.
That bidder is cutting corners, guaranteed. They are uninsured, using stolen or low-quality materials, reusing old flashing (a primary source of leaks), or not paying their crew a living wage. You will pay for that “discount” many times over in future repairs.
Step 5: Understanding Warranties (And What They Don’t Cover)
You will be presented with two warranties. They are not the same.
The Manufacturer’s Warranty (Materials)
This is the “Lifetime” or “30-Year” warranty you see advertised. As stated before, this covers factory defects in the shingles. It is prorated after an initial period and does not cover leaks from installation errors. This warranty is important, but it is not your primary protection against leaks.
The Workmanship Warranty (Labor)
This is the contractor’s warranty. This is their promise that their installation is correct. If the roof leaks in five years because of improperly installed flashing, this is the warranty that covers the repair.
Ask for this in writing. A one-year warranty is the bare minimum. A good contractor will offer 5 or 10 years. A truly elite, manufacturer-certified contractor may offer a 25-year or 50-year workmanship warranty that is backed by the manufacturer. This is the best protection you can get.
Questions to Ask Every Potential Roofer
Here is a final checklist of questions to ask during your meeting:
- Can I see your state license and your certificate of insurance?
- How long have you been in business under this name?
- Are you certified by the manufacturer whose shingles you are recommending?
- Who will be the on-site project manager, and will they be here all day?
- Do you use your own employees or subcontractors? (Employees are better for accountability).
- How will you protect my driveway, landscaping, and siding?
- What is your contingency plan for rotted decking?
- How many nails will you use per shingle? (The correct answer is 4, or 6 in high-wind zones).
- What is your written workmanship warranty?
The Final Decision: Trusting Your Gut and the Data
Choosing a roofer is a major financial decision that hinges on more than just price. It is about finding the best long-term value and the most reliable partner.
Base your decision on the data: who is properly insured, who has the best local reputation, who is certified, and who provided the most transparent and detailed bid?
But also, trust your gut. Who was the most professional? Who answered your questions patiently and thoroughly? Who communicated clearly? You are entering a partnership with this company.By doing your homework, verifying credentials, and refusing to be tempted by a lowball price, you can confidently select a true professional. You are not just buying shingles; you are investing in a high-quality roof installation service that will provide security and peace of mind for decades to come.